|
|
|
|
Warehouse Support
Beas Bin Management
|
|

With this app you can select a picking list generated from an SAP document, and create a reservation for each selected item in Beas.
Important: Beas only supports picking list documents created from Sales orders!
See basic WebApp controls in General Information on WEB APPS Version 2.1.
See Configuration wizard settings of the Web Terminal.
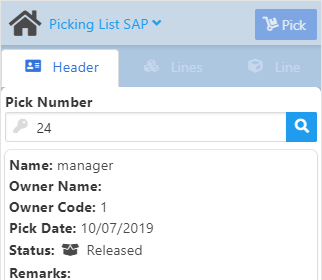
Header tab
After selecting an existing SAP picking list in the" Header tab", the user can start the picking process.
To Pick (reserve), use the button at the top right corner or just go to Lines.
The quantity is added to the quantity already reserved.
App settings
Print solution:
Select which document should be printed by the print solution.
Off: no printing
Crystal: Print Inventory or Sales Order
RTF: Print Inventory or Sales Order
Script: Print Inventory or Sales Order
See detailed description of Print types.
Note: SAP Picking list documents will not be listed when they are in an SAP bin location Warehouse.
Field Descriptions
Field |
Description |
|
|---|---|---|
Pick Number |
The number of Pick list document in SAP. Important: Beas only supports picking list documents created from Sales orders! |
|
Name |
Displays the code of the user selected in the Pick list. |
|
Owner Name |
The name of the employee who is responsible for picking the order. |
|
Owner Code |
Code of Personnel logged into the terminal |
|
Pick Date |
The date of picking |
|
Status |
|
|
Remarks |
Free text. |
In the Lines tab the user can select the items and the reserved quantities from the picking document.
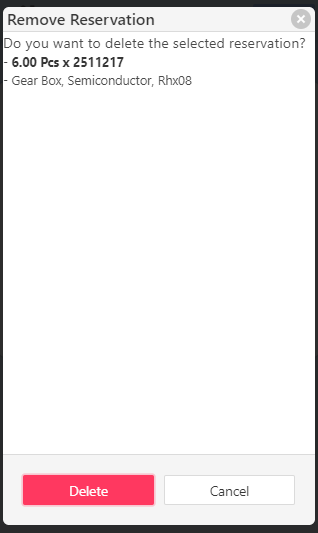
The list is read-only and displayed with 2 types of rows: 1 with the item required and total picked quantity and each of them with secondary lines that show the following details: the picked Bin location / Batch or Serial / and Quantity /delete icon. After selecting any Main line, the system goes to the Line tab to add a new quantity.
Field Descriptions
The delete Icon in the secondary line allows to remove from reservation, with a preview question:
Available Quantity is based on quantity that is not reserved, considering Batches -Serial - Bin Locations.
Reservation is possible when: User uses the pick button and all rules are OK. User goes to Lines or Header and all rules are OK. |

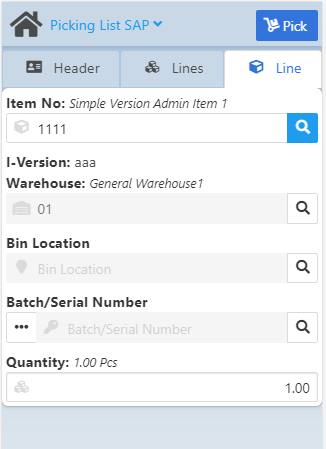
Line tab
In this tab you can add the quantity to be picked.
Field Descriptions
Field |
Description |
|
|---|---|---|
Item No. |
Item number. Select an item from the filter screen that opens with the magnifying glass button. |
|
I-Version |
Item version - field displays information in case of version-managed items. |
|
Warehouse |
Warehouse used for the picking process. The Warehouse code is indicated in the field. Select the warehouse with the magnifying glass button. |
|
Bin Location |
Select Bin location of the warehouse Limitation: SAP Bin Warehouses are not supported.
Because SAP is working with SAP Bin warehouses in a different method, by creating additional data in additional SAP tables, and it is mandatory to select batches and serials indicated in the picking list, SAP bin warehouses are not compatible with this application.
Note: Alternatively, you can use the Picking SO app, where we allow picking from any BIN (Beas and SAP). |
|
Batch/Serial Number |
The
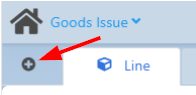
IMPORTANT: If you wish to add other serial numbers in different bin locations, you must insert an additional line by pressing "+": |
|
Quantity |
Picked quantity. the UoM is displayed in italics after the quantity right of the field name. |
 .
.
Settings:
Picking UoM
PATH: Administration > System Initialization > Configuration wizard > Terminal and WEB APP > Beas Web Terminal 2.1 > "App Setup".
Select the unit of measure for the picking process:
- Inventory: Inventory UoM
- Sales order: The unit of measure of the original sales order
See also extended App Setup.