
Terminal WebApps version 2.1 uses GS1-128 (formerly UCC/EAN-128) global bar code standard to match item codes from the item master data.
Frist step: Create a GTIN bar code in the Item Master data
Beas uses GTIN (EAN-14) bar codes for item identification. For the further encoding of GS1 standard, a 14 digit-bar code must be set up in the Item Master Data (see image below). The item code identifier in this case is "01": 0101234567891552
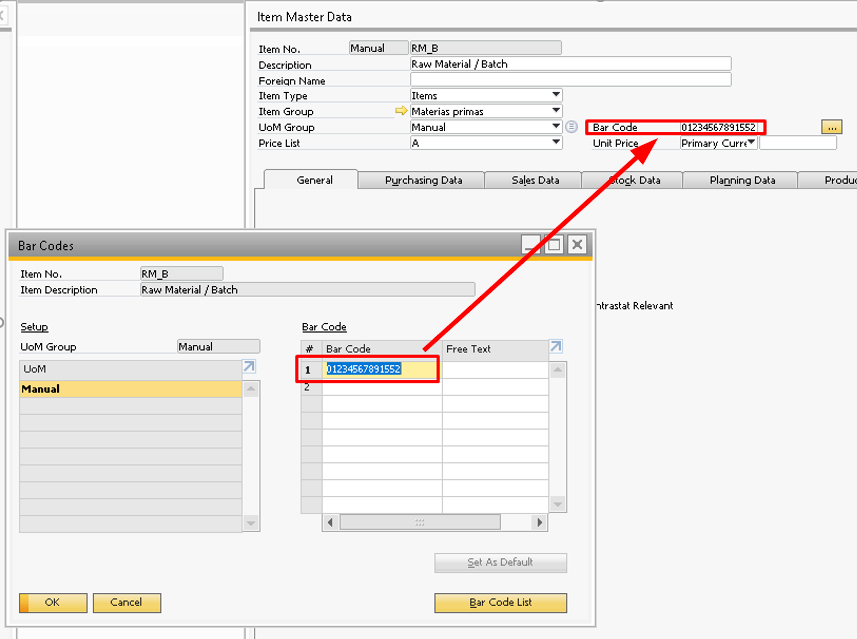
Window: artikel_edit.psr, artikel_edit_barcode_master.psr
Currently the following applications are supported by the GS1 standard:
- Goods receipt
- Goods issue
- Batch/Serial Inv. Info
- Warehouse Stock
- WO Backflushing
- WO Time Receipt
- Allocation
- Goods Receipt PO
- Inventory Counting by list
- Inventory Counting by item
- Pick Delivery
- Picking List SAP
- Picking SO
- Reservation
- Stock Transfer
- Stock Transfer Request
A GS1-128 symbol comprises of one or more Application Identifiers (AI) to indicate the type of data encoded inside.
For more information on GS1-128 open the link GS1-128 Bar codes.
Within the GS1 standard, AIs are used to prefix the encoded data. In the Terminal WebApps, we use 14-digit numeric characters as bar codes and the AI "01" denotes the alphanumeric information to match a specific code to the item master data. In the Terminal we use the following application identifiers to match item codes when using bar codes:
These AIs are added to the 14-digit code to make up the entire bar code information. Note: the AI(400) allows the input of only 29 characters instead of the 100 available in SAP in the Header tab. To be able to use this AI for Customer Purchase Order Number information, reduce characters to max. 29.
For further Application Identifiers see Application Identifier Values. |
In SAP B1 it is possible to create bar codes for the single items in Inventory > Bar Codes. Besides Item number filtering, there is a button "Bar Code List" to help manage bar codes. Once the 14-digit numeric code is saved in the system, the item number is ready for bar code generation according to the GS1 standard.
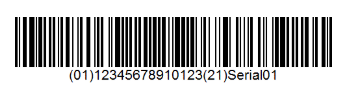
Examples: 1. Bar code for serial-managed item with the serial name at the end of the string:
(01) + the fourteen-digit bar code stored in SAP + (21) + serial name
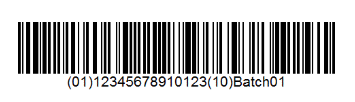
2. Bar code for a batch-managed item with the batch number at the end of the string:
(01) + the fourteen-digit bar code stored in SAP + (10) + Batch number
3. To generate Quantity in the end of the bar code, place backslash as an end of string character + add the number of items to the string. The following example is a bar code for a batch-managed item with batch number and quantity at the end of the string: (01) + the fourteen-digit bar code stored in SAP + (10) + Batch number + (30) + quantity. |

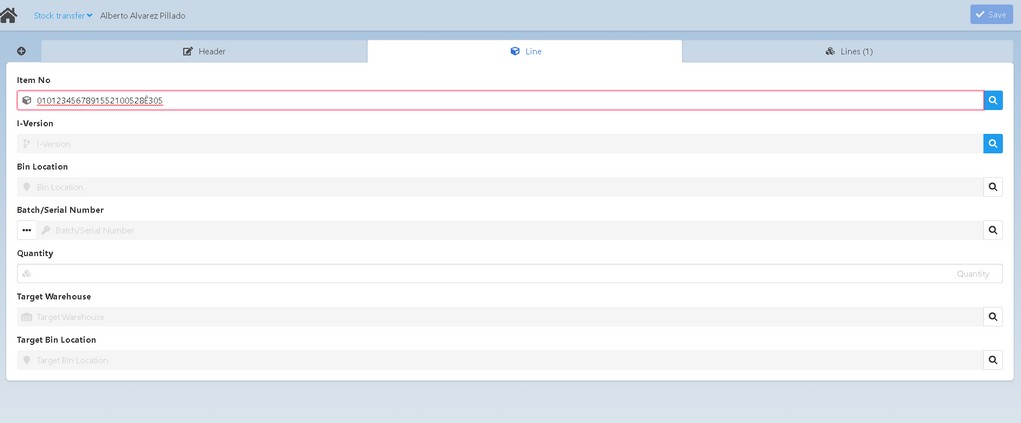
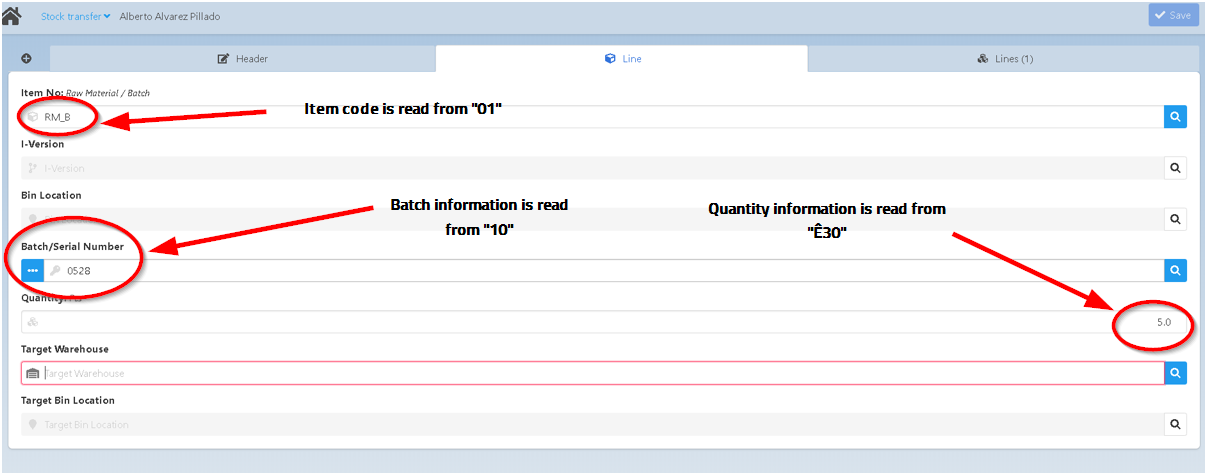
In the following section you can see examples of how the 14-digit GTIN (EAN) code is constructed with application identifiers in the defined fields of certain webapps. Example 1:
0101234567891552100528Ê305 01 – ItemCode Identification 10 – Batch Identification Ê30 - Quantity
1. Add the bar code in the Item No field of the Line tab:
2. Bar code is read by WebApp as follows:
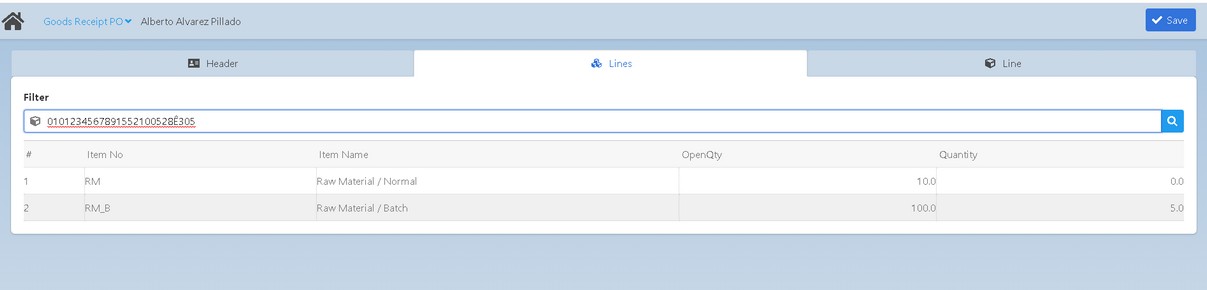
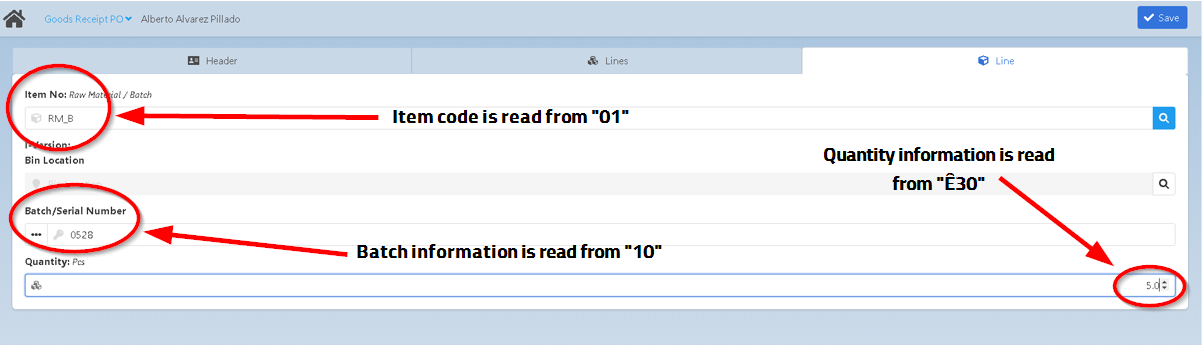
Example 2: Goods Receipt PO:
0101234567891552100528Ê305 01 – ItemCode Identification 10 – Batch Identification Ê30 - Quantity
1. Add the bar code in the Filter field of the Lines tab:
2. Bar code is read by WebApp as follows:
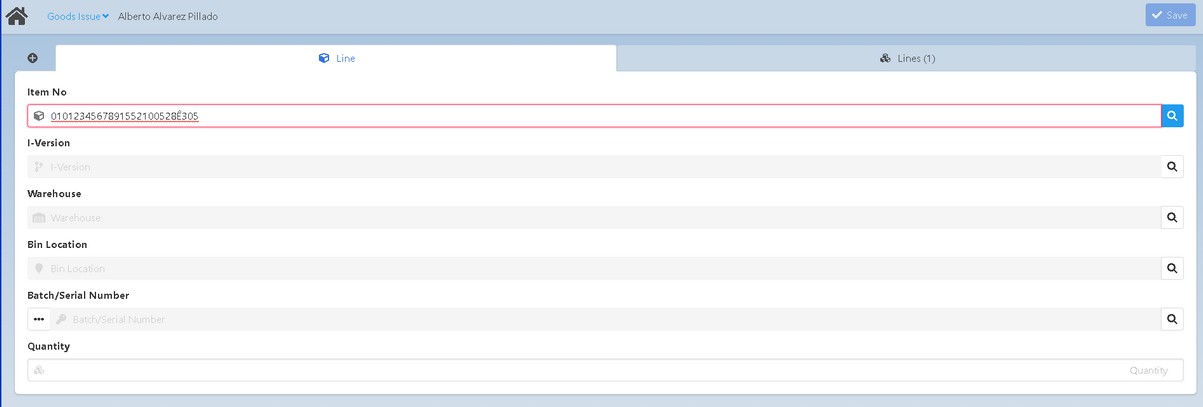
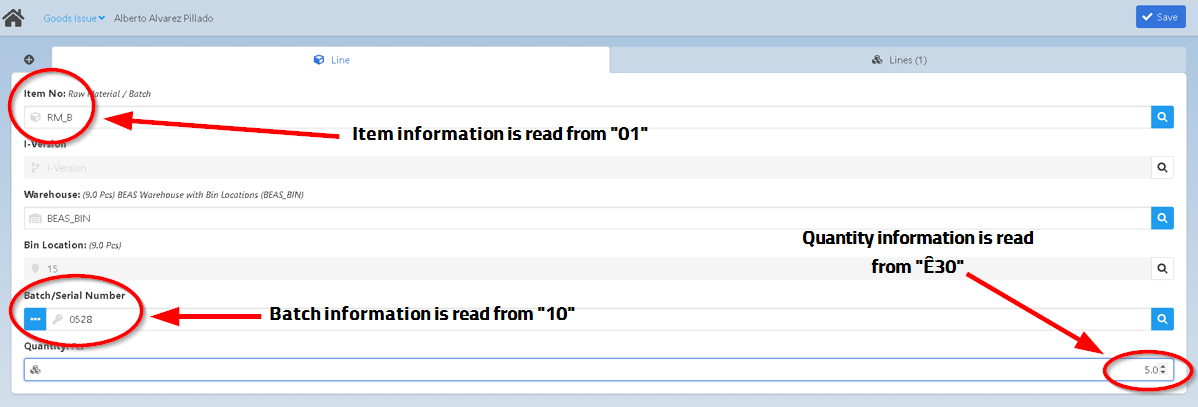
Example 3 Goods Issue:
0101234567891552100528Ê305 01 – ItemCode Identification 10 – Batch Identification Ê30 - Quantity
1. Add bar code in the Item No field of the Line tab:
2. Bar code is read by WebApp as follows:
|

Scanner can be used for:
Barcode |
App behavior |
BoM position |
Only BoM Bar codes are allowed if the first scanning was a BoM Bar code. The app will display the scanned line only. If you start with this process, you cannot change to another workflow. |
Routing position |
When scanning a Routing position, the app loads the WO position but only displays the lines that are linked to the scanned routing position. |
Work order position |
When scanning a Work order position, the app displays all the lines belonging to that position. |
Scanning steps:
1. Scan the Bar code,
2. Insert Details,
3. Scan next bar code.