PATH: Administration > Utilities > Beas Manage Server.
Configuration of Server management
By using different types of servers and the possibility to run services simultaneously, it is possible to configure complex, distributed server landscapes. This chapter is explains several configuration scenarios.
Attention:
This documentation is only for XAMPP/Tomcat Connector
New WEB Application support - only internal server. No settings are necessary for this internal server.
Scenario 1: Demo area of Beas Mobile
This scenario is to configure a dedicated demo area besides the productive environment for Beas Mobile. This demo area is based on a separate database.
1. Setup of BeasService #Prod
Window system_server_admin.psr
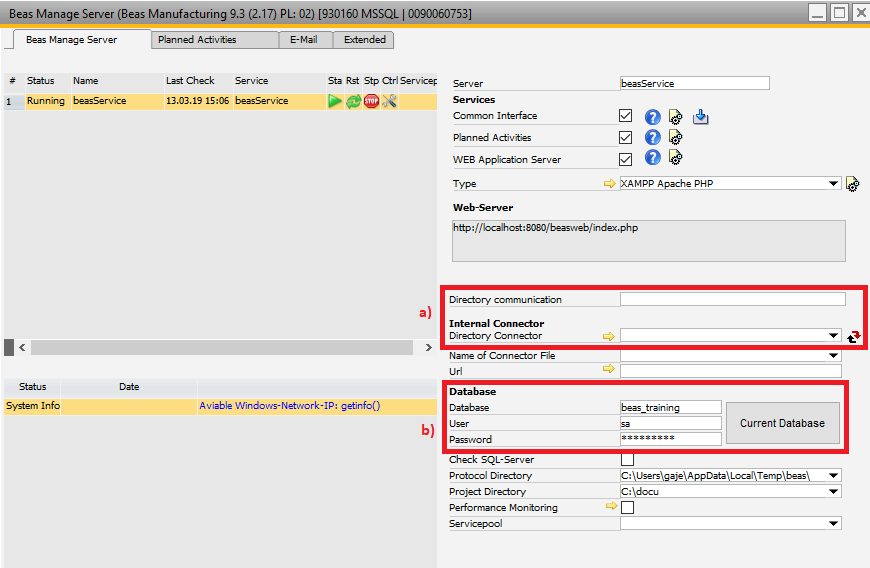
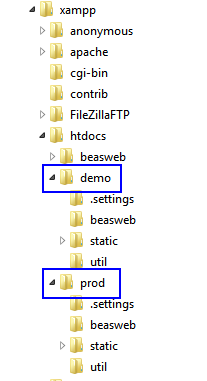
First step is to setup a productive environment to provide apps. For this, create a new service in the Beas Manage Server and activate Common Interface and HTML-Server. After changing this, select a type for the service (for example XAMPP). The important part is to select the correct directory for the connector and for the communication directory. It is recommended to use the following structure:
Tip 1:
Make certain that the selected directory already exists. The necessary files can be installed to the connector directory by clicking the icon next to the related field. In case there is a problem with installing the files, you can unzip them manually from the installed archive (common: C:\Program Files (x86)\beas software\beas\program\beasweb\beasweb.zip) to copy them to the target directory.
Tip 2:
The directory for the connector should contain a folder beasweb. In the Beas Manage Server window this directory should be displayed in the Directory communication field.
Tip 3:
When using Tomcat, the communication directory must be the same as the one for the index.jsp of the connector.
2. Setup of BeasService #Demo
Follow the steps to create the productive services and modify the settings for the directories of communication and for the connector. See (a) in the screenshot above.
Note: The connection to the database must be switched to the demo system (b).
3. DI-API configuration
You can modify the settings for the DI API in the CommonTab. This setting is saved to the current database. If you want to modify this for the specific instance of the service, use the Beas client to connect to the related database.
4. Test your systems
Make certain that your Apache or Tomcat is running. The system should be accessible with URL http://myserver/prod and http://myserver/demo.
Scenario 2: Load Balancing for BEAS Mobile
Current server systems are using multicore architectures and high reserves of memory (RAM). To allow Beas-Services to use these resources optimally, it is recommended to install multiple services for load balancing. Especially if it is needed to provide applications to a high amount of mobile devices, the installation of a multi-service architecture should be considered. It is possible to split the load for HTML-Services, to render the application interface in multiple instances, and give them separated URL endpoints to access.
1. Setup the Common Interface Service
First the so called Common Interface Service is necessary to process the business logic asynchronously. It is necessary to set the Asynchronous Processing on the Extended Tab.

Window system_server_admin.psr
2. Adding HTML-Services
Now, the preferred number of service instances could be added.
Note: All services must use their own folder for the Connector and for communication.
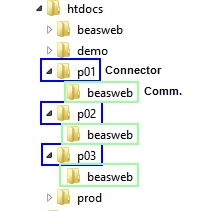
In this case the instances are accessible by the URLs http://myserver/p01, http://myserver/p02, ... .
3. System test
Before testing make sure that any services to test are running. Additional check the status of the Apache or the Tomcat service.
Call the Websites:
For all URLs BEAS should be accessible.