|
Bill of materials
Edit BoM
BoM positions
Edit BoM positions
Alternative material
Cross reference
BoM Batch change
Difference BoM
Copy BoM
PATH: Bill of Materials > batch-managed item > right-click > "Bill of Materials: Batch changes".
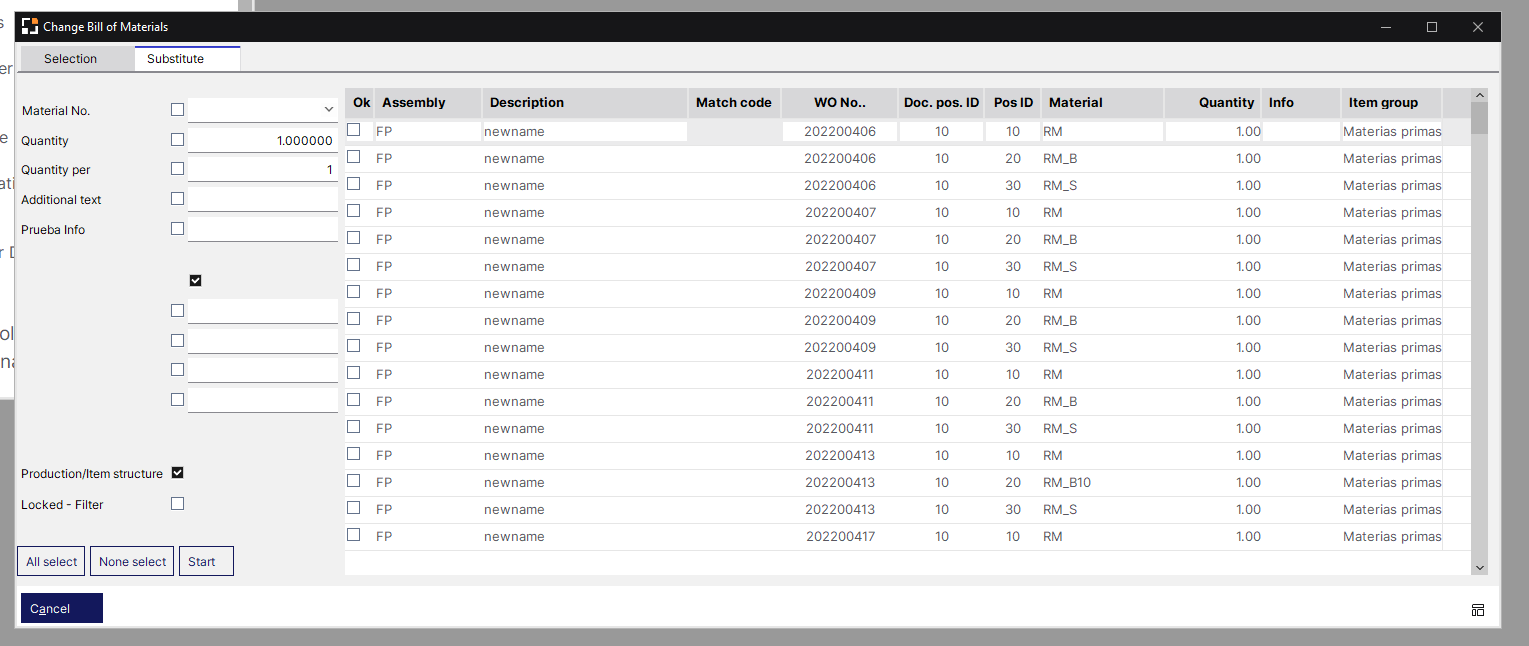
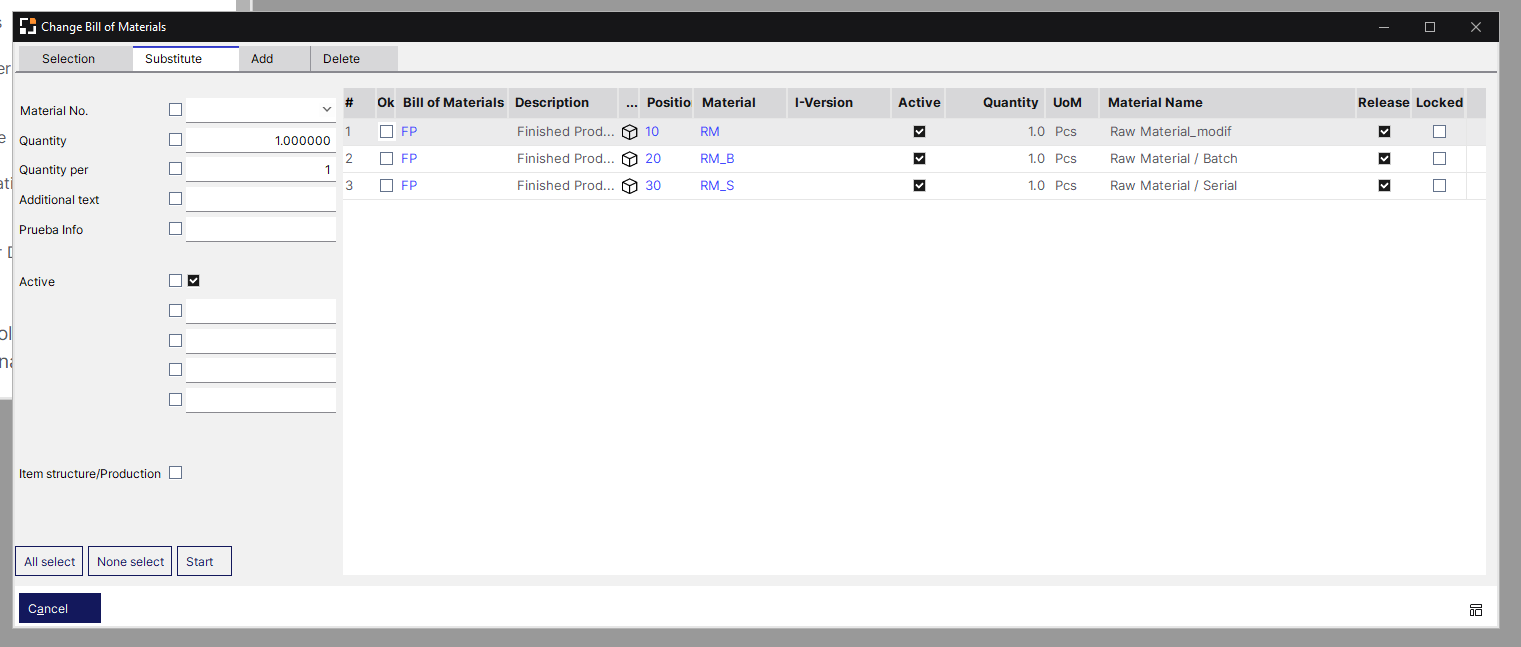
This function allows to change multiple BoMs simultaneously. First, select the change type and the material number to be replaced in the BoMs. This is done under tab "Substitute". Under "Add", new information are displayed.
By clicking "START", all affected BoM positions are displayed. Mark positions to be replaced/removed and click START again to start the process.
NEW: From version 9.3 PL2 this window allows to work with version-controlled items. This means that the values of items with separate Bill of materials can be updated massively. To cover this new functionality a new column is added with version information.
IMPORTANT: if one item has different version and some of its versions are linked to the main definition, these lines will be shown once with the main definition (Without any version number).
The tabs and the switch on the bottom of the window provide the same function.
|
|
|
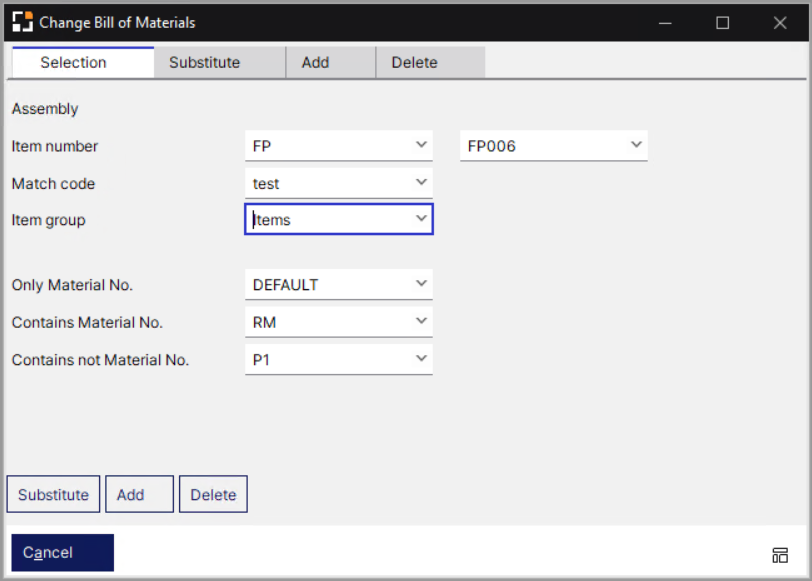
Selection
|
Filter options by: Item number, item group, match code. Conditions such as "Only material no.", "contains" or "contains not" are available in the selection fields.
|
Substitute
|
In the right, you can select window positions for value replacement. On the left side, the new information is entered for the appropriate fields. All BoMs with the specified material number can be changed. In the selected fields (material number, quantity, additional text, etc.) the values stored here are inserted. After finishing all entries, the replacement process is started by clicking "Start".
|
Add
|
Select items to be added to the BoM. Upon selection, the item report is displayed. Data to be entered are displayed on the left side. Then new BoM is inserted wherever the previously defined material number exists. Items will be appended or inserted at the specified position. In the latter case the previous item is replaced.
|
Delete
|
Display BoM items to be deleted.
|
Select the filters to narrow down the set of BoM to change.
Window artikel_stlpos_batch.psr
Field Descriptions
|
|
|
Assembly
|
|
Item number
|
Item number from-to: select a range between two item numbers to be filtered
|
Match code
|
Select match code
|
Item group
|
Select item group
|
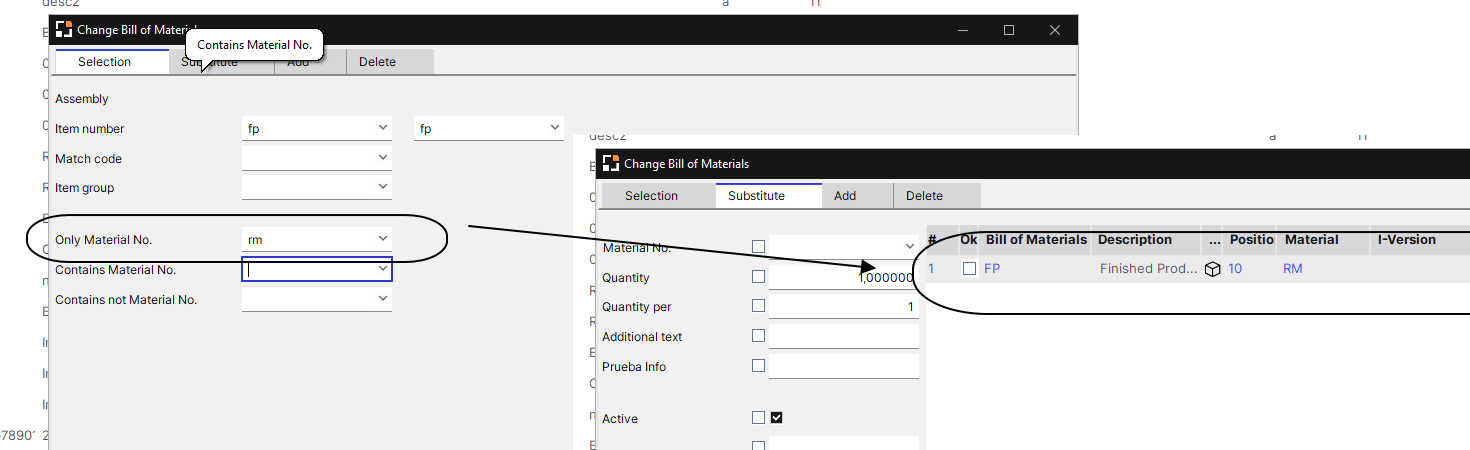
Only Material No.
|
With this filter defined, the system will display only the selected material in the Substitute tab.
 Example: Example:
We have item FP that contains 3 materials RM, RM_B, RM_S. if we apply filter by material "RM" system will display 1 only line:
|
|
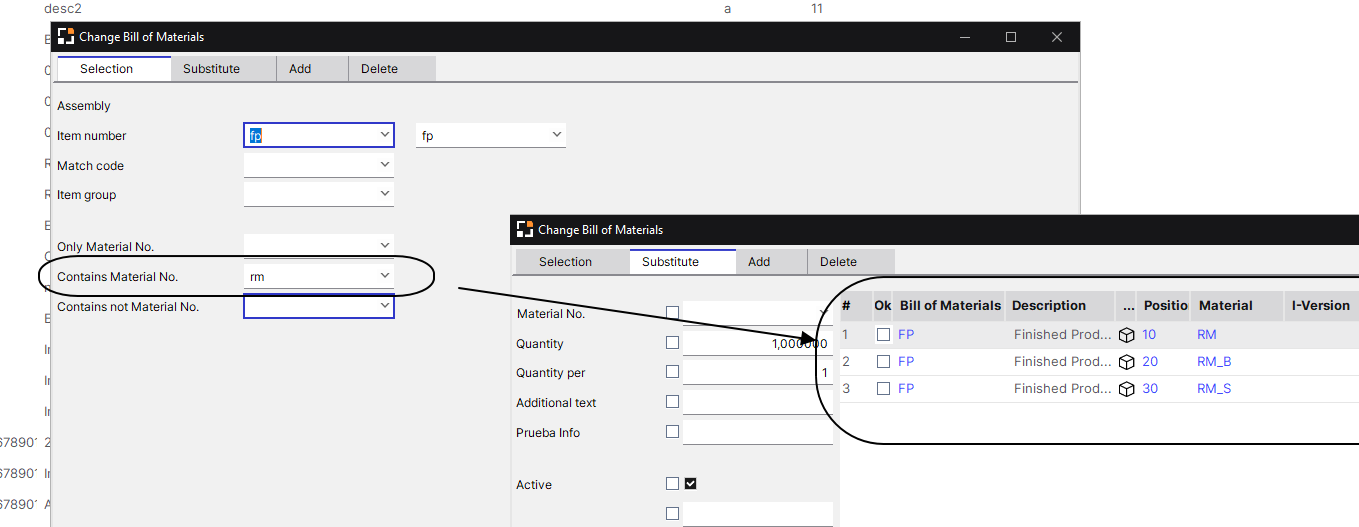
Contains Material No.
|
With this filter the system will display all materials related to selected item.
We have item FP that contains 3 materials RM, RM_B, RM_S. if we apply this filter with material "RM", the system will display 3 lines with each material:
|
|
Contains not Material No.
|
This filter definition applies the exact opposite behavior to "Contains material no." that is, the system will not display any materials related to the selected item.
|
Buttons:
Substitute: This button opens the "Substitute" tab to start replacement of the selected BoM.
Add: This button opens the "Add" tab to add materials to the selected BoM.
Delete: This button opens the "Delete" tab to remove materials from the selected BoM.
|
Substitute tab
Window artikel_stlpos_batch.psr
Field descriptions
Field
|
|
Material number
|
Select item number to insert.
|
Quantity
|
Add quantity to insert.
Note: Changing the quantity, conversion factors are not considered. Quantities are specified in Production units, stored conversion factors will be removed to Input Unit and warehouse unit.
(The fields beas_stl.input_qty, input_factor, input_unit will be deleted).
|
Quantity per
|
Requirement per assembly See quantity per.
|
Additional text
|
Free text.
|
Active (left and right box)
|
Left box: Set check marks to select this parameter to be changed.
Right check box: Enable to set the BOM item to active.
Disable to set the BOM item to inactive.
|
UDF 1-4
|
Free user-defined fields can be named in the Configuration wizard.
|
Ok
|
Selecting source item, then select "OK" at the items to substitute. Clicking the "Start" button will perform the replacement.
|
Production/Item structure
|
When check box is activated, the list shows production information. When unchecked, the list displays the item structure (see above).
|
Locked - Filter
|
Activate check box to hide locked Work orders. When unchecked, the WO list displays locked WOs.
|
Buttons:
All select: Clicking this button selects all items in the list to substitute (all "OK" fields are selected).
none select: Clicking this button clears all item selections (all "OK" fields are cleared).
Start: Clicking this button starts the mass replacement.
Right-click: Change Log - open the Change log for this BoM.
|
Add tab
In this tab you can add more materials to the selected BoM.

Window artikel_stlpos_batch.psr
Field descriptions
|
|
|
Append
|
When this check box is active, "position" field is ignored and new position ID will be generated and added at the end of existing BoM.
|
Position
|
The new item will inserted at the given position.
|
Material number
|
Selected material number for which the change applies.
|
Quantity
|
Selected quantity.
|
Quantity per
|
Requirement per assembly See quantity per.
|
Additional text
|
Free text.
|
Active
|
Check mark indicates whether the BoM items will be active or inactive after the change process. The status is changed in the "replace" tab (See above).
|
empty fields UDF
|
Free user-defined fields can be named in the Configuration wizard.
|
|
In this tab you can delete BoM items. Select materials from the list, and press Start.
|
back to Bill of Materials tab
Help URL: https://help.beascloud.com/beas202511/index.html?batchanderung.htm
|